How to make a family cookbook
A family cookbook is a few dozen recipes, the stories behind them and one deadline. This guide covers a decision to make first, seven steps from gathering to handing it over, and three ways to get the pages printed — with the honest tradeoffs of each.
Before you start: decide what the book is for
A cookbook with no point of view turns into a pile. Pick one idea before you collect anything, and every later choice gets easier. The usual ones: one cook (Grandma's kitchen, start to finish), one family (everyone's signature dish) or one occasion (the holiday table, the wedding, the retirement).
Then settle two practical things. Who gets a copy — one per household, or one per kid? And what's the deadline? A birthday, Thanksgiving or a retirement party gives you a date to work back from, and a date is what turns a someday project into a finished book.
Write the answers down where you'll see them. When a relative asks whether the neighbour's casserole belongs in the book, the theme settles it.
How many recipes?
For a first book, 20 to 60 recipes is a comfortable range. A 30-recipe book already feels like a real book, and it's small enough to finish. More is fine if you have them — you can always make a second volume.
For reference, a Tablespoon book holds 20 to 200 recipes. Whatever tool you end up using, check its page limits before you plan around a number.
Step 1
Gather every recipe, in whatever form it exists
Start by collecting, not cooking or editing. Put everything in one place — a folder, a box, one shared album — and sort it out later.
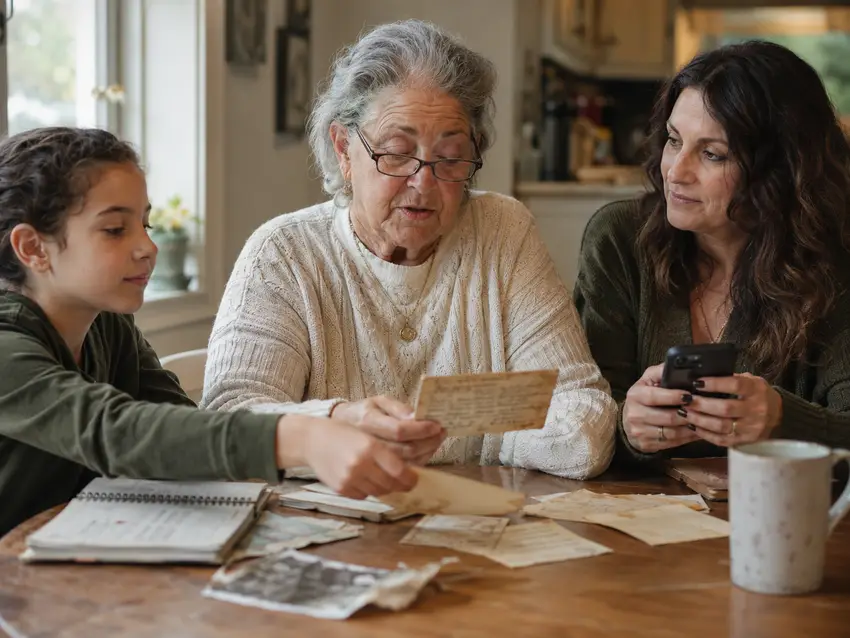
Photograph each handwritten card the moment you find it, before it gets lost again or someone takes it home.
Where recipes hide
Look further than the recipe box:
- The recipe box and the kitchen drawer, including cards tucked inside other cookbooks
- Notes apps and email drafts on your own phone
- Texts and group chats where someone once typed out the whole method
- Screenshots and bookmarked links you meant to come back to
- Printed cookbooks with pencil notes in the margins — the changes are the recipe
- The dishes only one person knows by heart
Asking relatives
Send one message, not five. Say what the book is, name a date and say any format is fine: a photo of a card, a screenshot, a voice memo, a few lines typed into a text.
In a big family, ask one person per branch to collect from their own side. It's easier to chase four people than forty, and nobody feels singled out.
Recipes nobody wrote down
Some of the best dishes live only in someone's hands. Cook alongside them, in person or on a video call, and measure the handfuls as they go: a scoop into a measuring cup, a glug into a spoon.
Write down what they say as well as what they do. "Until it smells right" is worth keeping, once you've added what that looks like in minutes.
Step 2
Write each recipe down so a stranger could cook it
Write for someone who has never met the cook. List the ingredients in the order they're used, with real quantities, and state the oven temperature, the pan size, the times and how much the recipe makes.
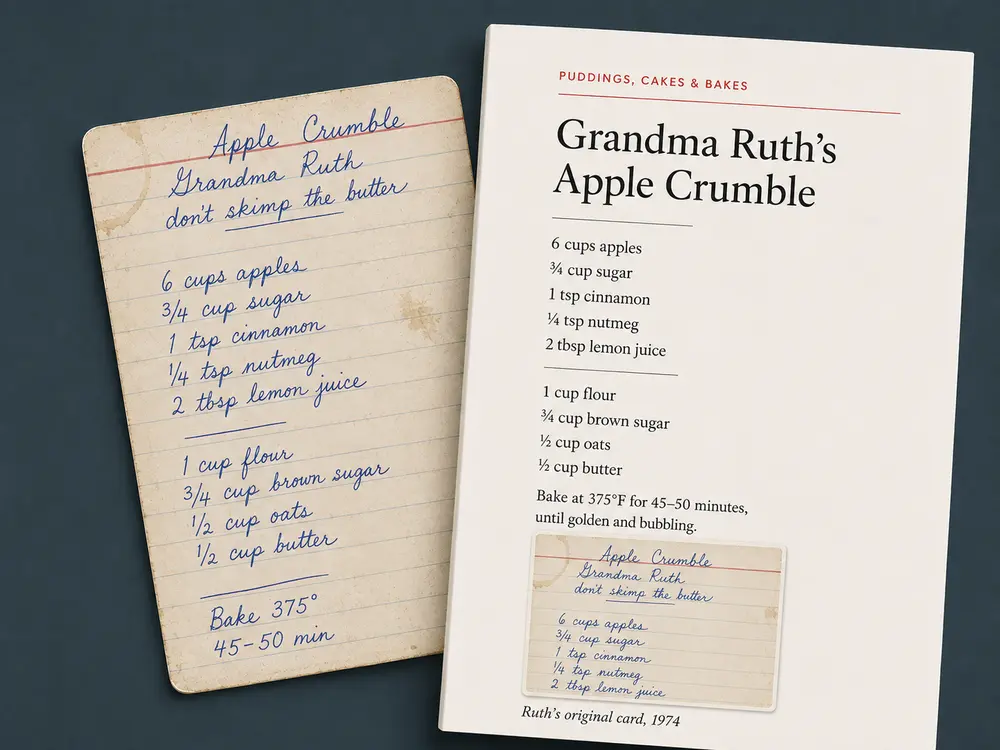
Convert the vague parts. "A pinch" becomes an eighth of a teaspoon. "Until it looks right" becomes what you should see — golden at the edges, a skewer coming out clean. Where you're not sure, cook the dish once and measure as you go.
If two relatives make the same dish differently, print both versions, or print one and add a line crediting the other. Either is better than quietly picking a winner.
Keep the original card. A photo of the handwriting, smudges and all, is what makes the page feel like it came from your family.
Test the doubtful ones. Cook anything with a vague method once from your own page, exactly as written, and fix what's missing. If a stranger would have to guess, the recipe isn't finished.
Step 3
Add the story
Two to four sentences per recipe is enough: who made it, when it started showing up on the table, what went wrong the first time. The stories are what people re-read long after they've stopped needing the recipe.
Ask the cook if you can. A short voice memo, typed up later, often gets better lines than a request to "write a bit about it".
For photos, aim for three kinds: the finished dish, the cook and the card. Phone photos are fine. Shoot near a window, turn the flash off and take the dish from slightly above.
Don't polish the stories until they sound like a book. Keep the speaker's voice — the run-on sentences and the "well, anyway" are what make it sound like them.
Step 4
Organize it into chapters
There's no right system, only the one that matches how your family actually cooks. By course (starters, mains, desserts) works for most books. By person suits a tribute. By occasion — Sunday dinners, Christmas morning, summer cookouts — works when the meals matter more than the dishes.
Name the chapters in your family's words. "Things Mom makes when you're sick" is a better chapter than "Soups".
Add a contents page and a short dedication. A paragraph about why the book exists, signed by you, does more than any design choice.
Sort the recipes into a rough order first, then read the contents aloud. If a chapter has two recipes or sixty, merge it or split it.
Step 5
Choose how you'll make the pages
There are three realistic routes. None is wrong; they trade money, time and polish differently.
Do it yourself
- Good for
- The lowest cost, and books you want to keep adding to. A binder lies flat on the counter and new pages slip in whenever another recipe turns up.
- You'll spend
- The most hours. Word, Google Docs or Canva for the pages, then a home printer or a local print shop.
- Watch out for
- It can look homemade, and keeping fonts, spacing and photos consistent across dozens of recipes is the real work.
A photo-book service
- Good for
- Good paper and flexible layouts, especially for photo-heavy books with fewer recipes.
- You'll spend
- Time laying out every page by hand in the service's editor.
- Watch out for
- Text-heavy pages get fiddly, and past a couple of dozen recipes the layout work adds up fast.
A recipe-book service such as Tablespoon
- Good for
- Bigger books and many contributors. You paste, type or photograph each recipe and it's typeset in one consistent style, with the photo of the original card beside it. Relatives add their own from anywhere.
- You'll spend
- Less time per page. You preview every page before anything prints.
- Watch out for
- Less page-by-page layout control, and it's a yearly plan with one printed book included ($69.99).
Pick the route you'll actually finish. A plainer book that exists beats a beautiful one that stays in a folder.
Step 6
Proofread and preview every page
Read the whole book three times, each pass with a different job:
- Numbers and steps: quantities, temperatures, times, and whether every ingredient shows up in the method.
- Names and spellings: relatives, places, dish names and who's credited with what.
- A fresh pair of eyes: hand it to someone who hasn't seen it and ask them to cook one recipe from the page.
Then page through the whole book the way a reader would. If you're printing it yourself, print one copy first and check margins, photo quality and page order before you commit to more.
Step 7
Print, ship and hand it over
Softcover is lighter, cheaper and easier to mail. Hardcover feels more like an heirloom and stands up better to a kitchen counter. Pick the one that matches where the book will actually live.
Plan on a copy for every kitchen that cooked from it, plus one for you. Ordering them all at once saves doing it twice.
Work back from the date. Printing and delivery take longer than you expect, and a holiday deadline doesn't move. For reference, Tablespoon's standard shipping arrives in 1–2 weeks and is free; express arrives in 3–5 business days for an additional fee. Whatever you use, leave a buffer.
When the books arrive, handwrite the dedication on the title page. A line in your own handwriting costs nothing, and it is the first page people turn to.
Where Tablespoon fits (and where it doesn't)
Tablespoon is for the third route in Step 5 — when you'd rather spend your time on the recipes than on the layout. In short:
- You paste, type or photograph each recipe, and the app structures the ingredients, steps and cook times into one consistent layout.
- A photo of the original handwritten card can be printed on that recipe's page.
- Recipes sit in chapters you name and reorder, under one of ten cover templates with your own title, photo and colours.
- Unlimited co-authors: family members log in from any device and add their own recipes.
- US Letter (8.5" x 11"), full colour on premium coated paper, softcover included and hardcover for a one-time $20, with 20 to 200 recipes per book.
- You preview every page before anything prints, and extra copies can be ordered at any time.
What it doesn't do: free-form page layouts where you place every element yourself, pages that aren't recipes, or print runs of hundreds. If that's what you need, one of the other routes will serve you better.
It's a yearly plan: $69.99 for a year of recipe editing and one printed book. If you don't renew, your recipes and books stay accessible and viewable, and recipes can be exported. For anything else, see our refund policy.
About a minute to set up · preview every page before it prints
Frequently asked questions
Twenty to sixty is a good range for a first book. A 30-recipe book already feels like a real book, and it's small enough to finish. If you have more, go ahead. Whatever tool you use, check its page limits before you plan around a number.
Mostly it depends on how fast the recipes come in; gathering from relatives is the slow part, so give everyone a date. Then work back from the day you need the books in hand.
Yes, and you should. Photograph each card first, then keep the original somewhere dry. In a DIY book, place the photo beside the typed recipe. If you use a recipe-book service, look for one that prints the card image next to the typeset recipe.
Ask each person to send photos, texts or typed recipes by a set date, or use a tool where they can add recipes themselves. With Tablespoon, co-authors are unlimited: relatives log in from any device and add their own recipes, wherever they live.
A standard US Letter page (8.5" x 11") gives recipes and photos room and lies open on a counter. Softcover is lighter and easier to mail; hardcover stands up better in a kitchen and feels more like an heirloom. Choose by where the book will live.
DIY costs paper, a binder or print-shop fees, and your time. Photo books depend on page count, so check the price for your own before you commit. Tablespoon is $69.99 a year with one printed book included; hardcover is an additional one-time $20.
That's the whole path: collect, write, add the story, organize, choose, check, print. Start with one recipe tonight.
Questions? Email us at hello@tablespoonbook.com