How to make a memorial cookbook
A memorial cookbook can be small, and it can wait. It is also one of the few projects after a loss that gives something back: a book the whole family can cook from, in the handwriting of the person who made the food. This guide covers how to gather what they left, keep their handwriting on the page, write the recipes up and make a book that can be passed around.
Start small, and only when you're ready
There is no deadline on this. You can begin with a single recipe, the one you reach for most, and stop there for a month. You can also put the recipe box away for a year and open it when it feels possible. Both are fine, and neither means you care less.
When you do begin, pick the smallest version of the book you would be glad to have. Often that is the five dishes everyone asks about at family gatherings, typed out properly and printed once. A small book that exists is worth more than a large one that stays in a drawer.
Decide who the book is for. It might be you alone, your brothers and sisters, or the grandchildren who never got to cook beside them. The answer shapes how much you include and how you write it up, and it tells you how many copies to plan on.
Then ask whether a date matters. Some people want the book on the table for the first holiday without them, or for a birthday or an anniversary. Others want no date at all, and that works just as well. If there is, you can work back from it later.
Step 1
Gather what they left
Start by collecting rather than cooking or editing. Put everything in one place, a folder or a box or a shared album, and leave the sorting for later. Short sessions are fine.
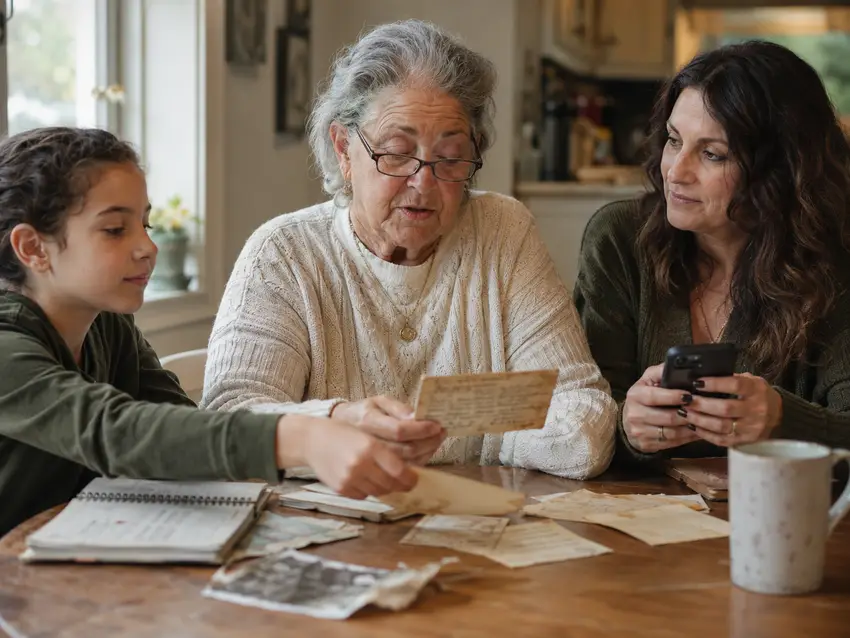
Their handwriting turns up in more places than the recipe box, so look widely before you decide what is missing.
What to look for
Check each of these, and photograph anything handwritten as you find it:
- The recipe box, and cards tucked inside other cookbooks or the kitchen drawer
- Cookbooks with notes in the margins, since the changes they made are the recipe
- The backs of envelopes, grocery lists and calendar pages with a method scribbled on them
- Texts, emails and voicemails where they talked someone through a dish
- Church, school and community cookbooks they contributed to
- The dishes only they made, which may not be written anywhere
Ask the people who cooked with them
Send one message to the family rather than several. Say what the book is, give a date that is far enough away to feel easy, and make clear that any format will do: a photo of a card, a screenshot, a few lines typed into a text, a voice memo.
Ask for the story along with the recipe. "What do you remember about when she made this?" gets a better answer than "Can you send the recipe?", and it saves you a second round of messages.
The dishes nobody wrote down
Ask whoever stood next to them in the kitchen. Often two or three people each remember a piece: one the spices, another how long it went in the oven, another what it looked like when it was done. Put the pieces together on a call or around a table.
Then cook it, and measure as you go: a scoop into a measuring cup, a glug into a spoon. Say your mother never wrote down the oven temperature. Try 350°F, note what happens, and adjust.
The first attempts will probably not taste the same, and that is expected. Write the recipe down anyway. The version you can make again is the version that survives, and the next person who cooks it can adjust it further.
Step 2
Keep their handwriting
Before you do anything else with the cards, photograph every one. Do the front and the back, since people write notes on the back. Daylight from a window works better than flash, and a plain surface keeps the edges clear.
Keep the originals. A book is a copy, and the card is the thing itself. Store the cards somewhere dry, in the box they came in or in sleeves, and decide together who looks after them.
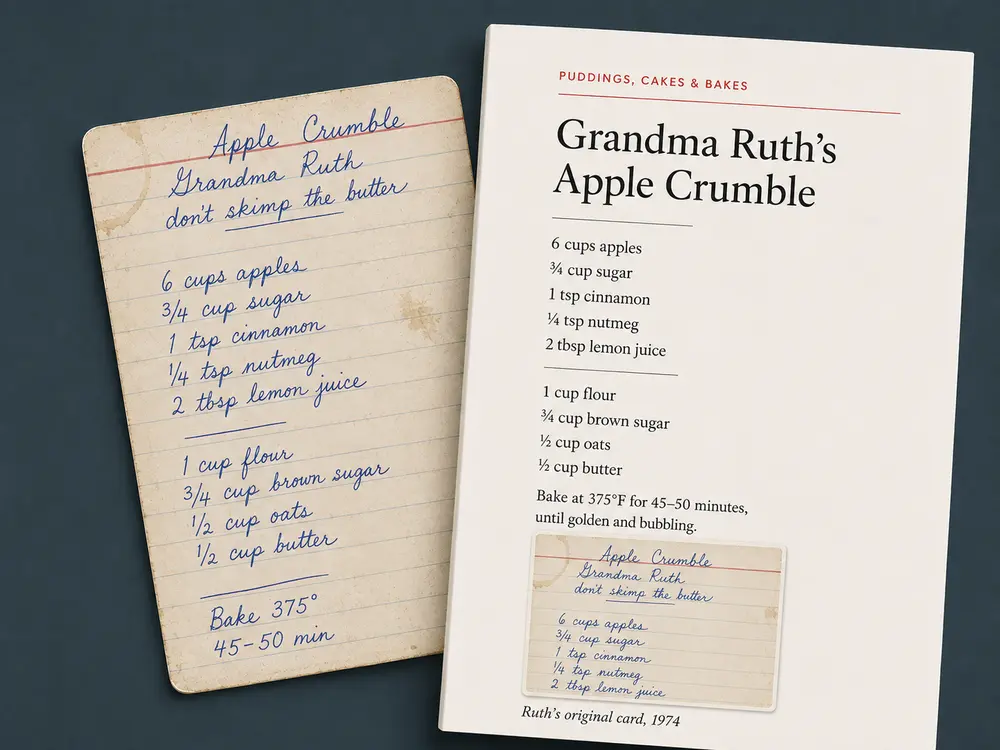
The point of each page is the handwriting sitting next to a version a stranger could cook from. The card carries the person, and the typed recipe carries the instructions. You want both, together.
How to preserve handwritten recipe cards covers scanning, storing and difficult cards in more detail.
Step 3
Write each recipe so it can be cooked from
Type each recipe exactly as it was written first, with their spelling, their abbreviations and their shortcuts. Do not tidy anything yet. That plain copy is your record.
Then make a second pass for the cook who comes after you. Add what is missing in brackets or a short note: the oven temperature, the pan size, how many it serves, what "bake until done" looks like. A note such as "she never wrote the temperature; 350°F works" is honest and useful.
Leave their voice alone. If she wrote "a good handful" or "cook till it smells right", keep it, and put the measured version beside it.
If two relatives remember the same dish differently, print both versions and credit each person. Nobody has to be wrong, and the differences are part of the family's story.
Step 4
Add the stories, in other people's words
A recipe tells people how to make the dish. A few sentences tell them why anyone bothered. Ask each relative for two to four sentences about one dish: when it appeared on the table, who asked for it, what went wrong the first time someone tried to copy it.
Voice memos are a good way in, because many people talk easily and write awkwardly. Type the recording up later and keep the run-on sentences and the "well, anyway". That is what makes it sound like the person speaking.
Include photographs. One of the cook belongs in the book, in the kitchen if you have one. If someone still makes the dish, a photo of the finished plate helps too. Phone photos are fine.
Consider a short piece at the front about who they were in the kitchen. Ask one person to write it rather than a committee, since one voice holds together better than five. A page is plenty.
Step 5
Put it in an order that sounds like them
Starters, mains and desserts work fine, but a memorial book can do something warmer. Name the chapters the way the family remembers the cooking: "Sunday", "What she made when you were sick", "Christmas Eve".
Add a contents page so people can find the dish they are looking for, and a dedication, which can be two lines. Consider leaving a few blank pages, or a note at the back, inviting the next generation to add recipes of their own.
When you have a rough order, read the contents aloud. If it sounds like the way they would have described their own cooking, you have it right.
Step 6
Make the book
There are three realistic ways to turn the pages into a book, and none of them is wrong.
A binder or a home-printed document costs the least and lets you keep adding pages. You lay out the recipes in a word processor, print them at home or at a print shop, and put them in sleeves. It takes the most hours and can look homemade, which for some families is exactly right.
A photo-book service gives you good paper and flexible layouts, and it suits books with many photos and fewer recipes. Text-heavy pages get fiddly, and every page is laid out by hand.
A recipe-book service typesets each recipe in one consistent style and prints the book for you, which helps when there are many recipes and several people contributing. You get less control over the look of each page.
The full guide to making a family cookbook compares the three routes in detail.
When you're ready, you can see how Tablespoon puts a card on the page.
Questions about how it works are answered in the FAQ.
Step 7
A copy for everyone who misses them
This is the project where extra copies matter most. A book that lives in one house is a book only one household can cook from. Plan on one for each branch of the family, and one for the grandchild who was too young to cook with them.
A softcover tends to suit the kitchen, where it will get splashed. A hardcover suits the shelf, or a gift to the person who was closest to them. You can mix the two.
If a date matters, work back from it and leave more time than the printer's shipping estimate. Delivery is the part you cannot hurry.
When the books arrive, write the dedication by hand on the title page. A line in your own handwriting costs nothing, and it is usually the first page people turn to.
Where Tablespoon fits (and where it doesn't)
Tablespoon is a recipe-book service, the third route in Step 6. In short:
- A photo of the original handwritten card can be printed on that recipe's page, beside the typeset version.
- Recipes sit in chapters you name and reorder, under one of ten cover templates with your own title, photo and colours.
- Unlimited co-authors: siblings and cousins log in from any phone or computer, wherever they live, and add their own recipes.
- You preview every page, and nothing prints until you order.
- US Letter (8.5" x 11"), full colour on premium coated paper, softcover included and hardcover for a one-time $20.
- Between 20 and 200 recipes per book.
- Standard shipping arrives in 1–2 weeks and is free; express arrives in 3–5 business days for an additional fee. Extra copies can be ordered at any time.
What it doesn't do: free-form page layouts where you place every element yourself, pages that aren't recipes, or print runs of hundreds.
It's a yearly plan: $69.99 for a year of recipe editing and one printed book. If you don't renew, your recipes and books stay accessible and viewable, and recipes can be exported at any time. For anything else, see our refund policy.
Nothing prints until you order, and you can take as long as you need
Frequently asked questions
There is no right time. Some people start within weeks because it gives their hands something to do; others wait a year or more. Gathering the cards and photographing them is a gentle first step that commits you to nothing, and you can decide later whether to make a book.
A handful is enough to begin. Twenty recipes already make a real book. If you have fewer, add the dishes they loved to eat as well as the ones they cooked, the ones relatives remember them making, and a few pages of stories. Short books are easier to finish and easier to hand around.
They usually won't, exactly. Hands, ovens and ingredients all change. Cook the dish, write down what you did, and note where it differs from what you remember. A recipe you can make again is worth more than a perfect one nobody can reproduce, and the next cook can adjust it.
Yes, if they cooked them often. A recipe clipped from a newspaper or copied from a neighbour became theirs by being made at their table. Add a line crediting where it came from, if you know, so the book stays honest about its sources.
Send one message with a clear date, and say any format is fine. A tool with shared access helps too: Tablespoon has unlimited co-authors, so relatives log in from any phone or computer and add their own recipes and stories, wherever they live. Then you only need to nudge, not collect.
Yes, and you should. Photograph each card first, front and back, then store the originals somewhere dry and dark. The book is a copy. Some services can print the photo of the card beside the typed recipe, so the handwriting appears in the book while the card stays safe.
Begin with one recipe, or with none, whenever it feels possible. The cards will still be there, and so will the people who want to cook from them.
Questions? Email us at hello@tablespoonbook.com