How to make a personalized cookbook
A personalized cookbook is a book of recipes that could only belong to one family, one cook or one couple. The recipes matter, but so do the handwriting, the stories and the names on the chapters. This guide covers what makes a custom cookbook feel personal, what to put in it, the design choices worth your time, how to give one as a gift, and the honest tradeoffs between making it yourself and using a service.
By Luke from Tablespoon
What makes a cookbook personal
Any shop can sell you a book of recipes. What a shop can't sell you is the lasagne your aunt makes every Easter, written the way she says it, with a photo of her card beside the typed version. That gap is the whole point of a personalized cookbook.
Putting a name on the cover is the smallest part of it. A book with a monogram and fifty recipes copied from the internet is decorated, not personal. The personal parts are the things only your family can supply: the recipes people actually cook, the handwriting they were written in, the stories about the first time they went wrong, and the names everyone uses for them at the table.
That is good news if you are worried about design. You don't need to be a designer to make one. You need the recipes, a few sentences about each, and a handful of choices about how it all fits together. The rest of this guide is about those choices.
Step 1
Decide who it's for and what it holds
Before you collect anything, decide whose book this is. The answer changes almost everything else. A book for your mother might be built around her own recipes. A book for a newly married couple might collect a dish from every family at the wedding. A book for your kids might be the twenty dinners they grew up on, written down before they leave home.
Then pick one idea to hold it together. The common ones are one cook (Grandma's kitchen, start to finish), one family (everyone's signature dish), one occasion (the holiday table, a wedding, a retirement) or one place (the recipes from the house you grew up in). A clear idea makes the hard decisions easy. When someone suggests a recipe that doesn't fit, the theme says no for you.
How big should it be?
Smaller than you think. Twenty to sixty recipes is a comfortable range for a first book, and a book of thirty already feels substantial in the hand. A short book that gets finished beats a long one that stalls at recipe forty. For reference, a Tablespoon book holds up to 190 recipes, or about 790 with extra pages. Whatever you use, check its limits before you plan around a number.
Step 2
Choose the recipes only your family has
The best personalized cookbooks are made of recipes people already cook, not ones they mean to try someday. When you decide what goes in, look for these first:
- The dish someone always brings, and is always asked to bring
- Holiday recipes that come out once a year, which are the easiest to lose
- Weeknight staples nobody thinks to write down because they seem too ordinary
- Recipes that changed as they were handed down, with a note on who changed what
- Recipes clipped from a packet or a magazine and made so often they belong to the family now
- The dish nobody has ever written down, which someone will have to cook while you measure
If two people make the same dish differently, include both and credit each cook. It costs a page and saves an argument, and the differences are part of the story.
The guide to making a family cookbook covers gathering, writing up and organizing recipes step by step.
Step 3
Add the parts nobody else can: handwriting, stories and photos
This is the step that turns a recipe collection into a personalized cookbook. It is also the step most people skip, because it feels like extra work. It is less work than it looks, and it is what people read first.
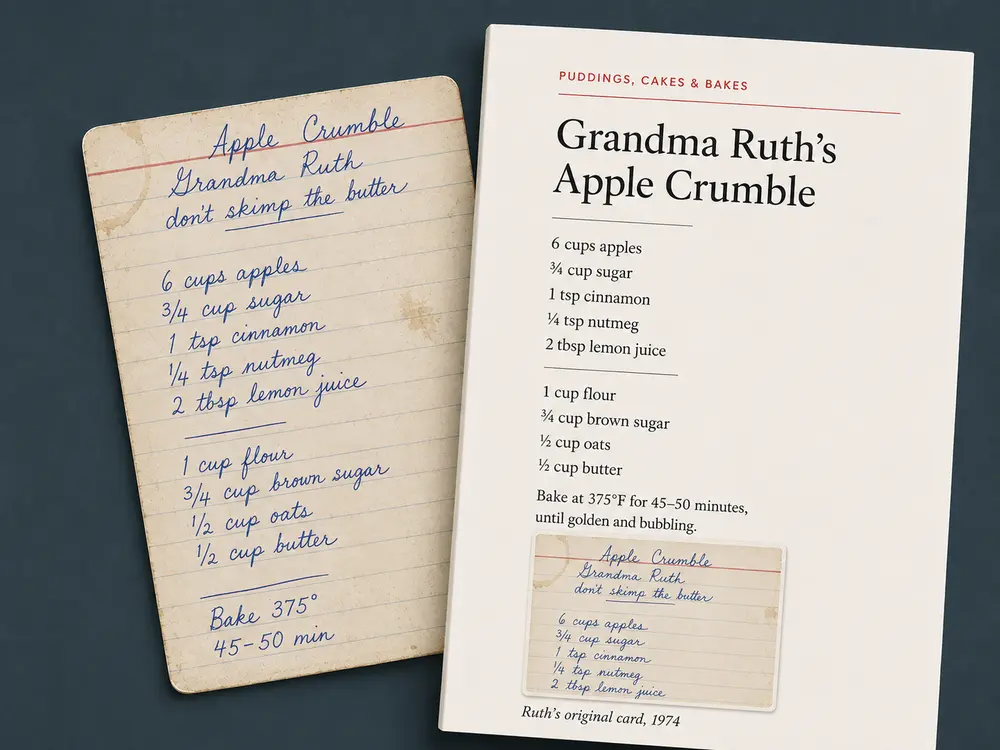
Handwriting
If the recipes came from cards, keep the cards in the book. Photograph each one in window light without flash, then put the photo on the same page as a typed version someone can cook from. The typed version is for cooking. The card is the reason anyone keeps the book.
If the cards are old or fragile, read how to preserve handwritten recipe cards before you start photographing them.
Stories
Two to four sentences per recipe is plenty: who made it, when it first appeared on the table, what went wrong the first time. Ask the cook if you can. A voice memo typed up later often gets better lines than asking someone to write a paragraph, and it keeps the way they actually talk.
Photos
Aim for three kinds: the finished dish, the cook and the card. Phone photos are fine. Shoot near a window, turn the flash off and take the plate from slightly above. A slightly blurry photo of your grandfather at the stove is worth more to this book than a perfect photo of a stranger's pie.
Step 4
Design choices that make the biggest difference
You don't need a designer's eye, but a few choices do more for the finished book than any amount of decoration.
The cover
Give it a name the family actually uses. "Nana's Kitchen" or "The Okafor Family Table" will mean more than "Family Recipes". A photo works well on the cover if it shows a person or a table rather than a stock image of vegetables. Keep the title short enough to read from across a room.
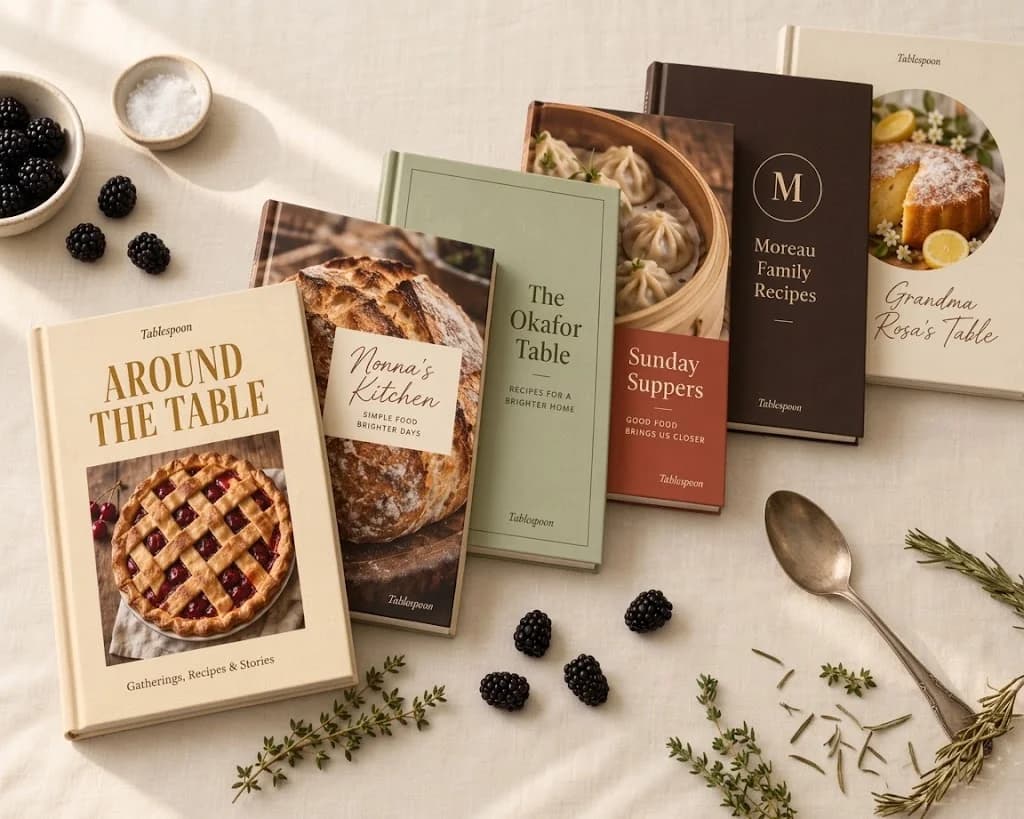
Chapter names
Organize by course if that is how your family cooks, but name the chapters in your own words. "Things Mom makes when you're sick" says more than "Soups", and "Sunday after church" says more than "Mains". Chapter names like these are often the first thing people mention.
One consistent layout
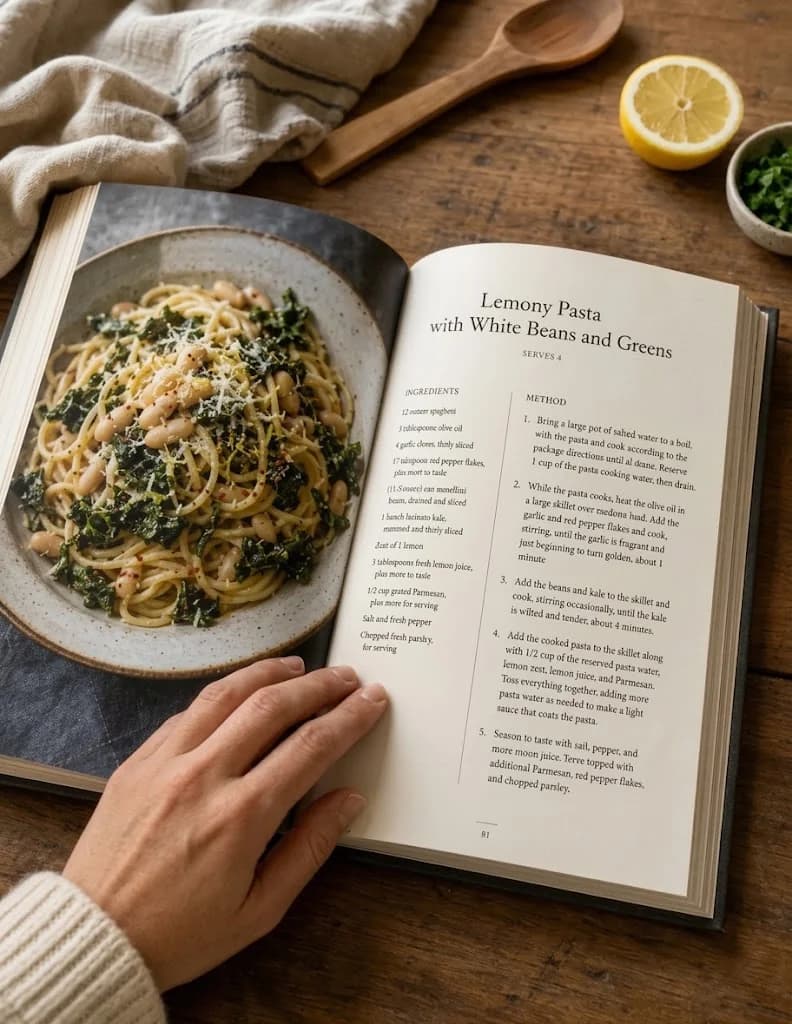
What makes a homemade book look homemade is inconsistency: a different font on every page, ingredients in a list on one recipe and buried in a paragraph on the next, photos at random sizes. Pick one layout for every recipe and stick to it. The personality should come from the content, not from changing the fonts.
The pages around the recipes
Add a dedication at the front, a contents page and perhaps a short piece about the cook or the family. A few blank pages at the back, labelled for recipes still to come, tell the next generation the book isn't finished.
A personalized cookbook as a gift
A custom cookbook is one of the few gifts that suits the person who has everything, because nobody else can buy it for them. It works for a parent or grandparent, a couple getting married, a kid who has just moved out, or the family cook on a milestone birthday.
Decide early whether you are giving a finished book or the project itself. A finished book is a complete surprise and takes the most work from you. Giving the project means you set the book up with a cover and the first handful of recipes, then hand it over so the recipient and relatives can fill in the rest. That suits a recipient who is the family cook and knows where the recipes are.
If the person the book is for is also the person who knows the recipes, start with everyone around them. A sibling, a partner or a parent can often find the cards, and the dishes served every holiday are easy to reconstruct because everyone has eaten them.
For timing around the holidays, see a family cookbook as a Christmas gift.
For a wedding, how to make a bridal shower recipe book covers collecting recipes from the guests.
Step 5
Make it yourself or use a service
There are three realistic ways to turn your recipes into a book. They trade money, time and polish differently, and none of them is wrong.
Do it yourself
- Good for
- Full control over every page, the lowest cost, and books you want to keep adding to. A binder lies flat on the counter and new pages slip in whenever another recipe turns up.
- You'll spend
- The most hours. Word, Google Docs or Canva for the layout, then a home printer or a local print shop.
- Watch out for
- Keeping fonts, spacing and photos consistent across dozens of recipes is the real work, and the result can still look homemade.
A photo-book service
- Good for
- Good paper and flexible layouts, especially for photo-heavy books with fewer recipes.
- You'll spend
- Time laying out every page by hand in the service's editor.
- Watch out for
- Text-heavy recipe pages get fiddly, and past a couple of dozen recipes the layout work adds up quickly.
A recipe-book service such as Tablespoon
- Good for
- Bigger books and several contributors. Each recipe is typeset in one consistent style, with a photo of the original card beside it, and relatives can add their own from anywhere.
- You'll spend
- Less time per page. You preview every page before anything prints.
- Watch out for
- Less page-by-page layout control, and it's a one-year plan with one printed book included ($69.99, paid once).
Choose the one you will actually finish. A simple book that exists is worth more than a beautiful one still sitting in a folder.
For binding, paper and preparing files, how to print a cookbook covers the printing side in detail.
Where Tablespoon fits (and where it doesn't)
Tablespoon is a recipe-book service, the third route in Step 5. In short:
- You paste, type or photograph each recipe, and the ingredients, steps and cook times are set in one consistent layout.
- A photo of the original handwritten card can be printed on that recipe's page, beside the typeset version.
- Recipes sit in chapters you name and reorder, under one of ten cover templates with your own title, photo and colours.
- You can add a photo and a personal note to any recipe: who made it, when it was served, what went wrong the first time.
- Unlimited co-authors: relatives log in from any phone or computer and add their own recipes.
- US Letter (8.5" x 11"), full colour on premium coated paper, softcover included and hardcover for a one-time $20, with up to 190 recipes per book (about 790 with extra pages). You preview every page before anything prints.
What it doesn't do: free-form page layouts where you place every element yourself, pages that aren't recipes, or print runs of hundreds. If that's what you need, one of the other routes will serve you better.
It's $69.99, paid once: a year of recipe editing and one printed book. Nothing renews automatically; we'll email you before the year ends if you'd like another year. For anything else, see our refund policy.
About a minute to set up · preview every page before it prints
Frequently asked questions
The recipes your family actually cooks, a photo of each handwritten card where you have one, two to four sentences about each dish, and a few photos of the food and the cooks. Add a dedication and a contents page. Those parts make it personal far more than the design does.
Not really. People use both terms for a cookbook made from your own recipes rather than a published one. What matters is how much of the book is genuinely yours: the recipes, the handwriting and the stories, not only the name on the cover.
Twenty to sixty is a comfortable range for a first book, and twenty already feels like a real book. Tablespoon books hold up to 190 recipes, or about 790 with extra pages. A shorter book of dishes people really make is better than a long one padded with recipes nobody cooks.
Yes, and they are often the best part. Photograph each card in window light, then place the photo beside a typed version someone can cook from. With Tablespoon, a photo of the original card is printed on the recipe's page beside the typeset version.
For most families, yes, because it can't be bought anywhere else. Give a finished book if you want a surprise and have the time, or give the project if the recipient is the family cook. Plan on a copy for every household that will want one.
A DIY book costs paper, binding and your time. Photo-book services usually price by page count, so check the quote for your own book. Tablespoon is $69.99 a year with one printed softcover book included; hardcover is an additional one-time $20, and standard shipping is free.
Start with the one recipe you would most hate to lose. Write it down properly, add two sentences about who made it, and the rest of the book has somewhere to begin.
Questions? Email us at hello@tablespoonbook.com